
Introduction to Peach Cobbler Cheesecake
The Peach Cobbler Cheesecake is a decadent fusion of two beloved desserts—Southern peach cobbler and classic New York-style cheesecake. This unique combination delivers the creamy richness of cheesecake layered with the sweet, spiced goodness of baked peaches and buttery cobbler topping. It’s a dessert that captures the warmth of comfort food and the elegance of gourmet baking.
- Peach cobbler brings the fruity, cinnamon-infused filling topped with a crisp, buttery crust.
- Cheesecake provides a smooth, tangy base that balances the sweetness of the fruit.
As its popularity rises across social media and dessert blogs, more bakers are drawn to its stunning presentation and nostalgic flavor.
Whether served at summer gatherings or festive dinners, Peach Cobbler Cheesecake continues to gain fans thanks to its bold flavor profile and irresistible texture.
Ingredients Overview
To make a truly memorable Peach Cobbler Cheesecake, starting with the right ingredients is essential. Each component plays a key role in balancing flavors and textures. Whether you prefer using fresh seasonal peaches or convenient canned ones, the goal is to create a dessert that’s rich, creamy, and bursting with peach flavor.
Key Ingredients:
- Peaches:
- Fresh peaches are ideal when in season—choose ripe, fragrant fruits with a slight give.
- Canned peaches are a great year-round option—just ensure they are well-drained and packed in juice rather than syrup.
- Cream Cheese:
- Go for full-fat cream cheese for the richest texture. Make sure it’s softened before mixing to avoid lumps.
- Graham Crackers:
- Crushed graham crackers create the buttery crust that supports the creamy cheesecake layer.
- Sugar, Cinnamon, Nutmeg:
- These are essential for adding warm, spiced notes to both the filling and cobbler topping.
- Butter:
- Unsalted butter is best for control over flavor. It’s used in both the crust and the cobbler topping.
- Eggs and Sour Cream:
- Eggs provide structure to the cheesecake while sour cream adds a subtle tang and enhances creaminess.
Tips for Quality Ingredients:
- Choose organic or locally grown peaches when possible for better flavor.
- Use brick-style cream cheese, not whipped or spreadable varieties.
- Make your graham cracker crumbs fresh rather than using pre-crushed for better texture.
- Freshly ground nutmeg will offer more aroma than pre-ground spice.
- Always bring ingredients like cream cheese, eggs, and sour cream to room temperature before using for a smooth, lump-free batter.

Step-by-Step Preparation Guide
Creating the perfect Peach Cobbler Cheesecake involves several layers, each contributing to the delicious creamy texture and warm peach flavors. Follow this guide to make each component come together harmoniously.
1. Preparing the Crust
The graham cracker crust is the foundation of your cheesecake, providing a crunchy, buttery contrast to the smooth filling.
- Preheat the oven to 325°F (163°C).
- Combine crushed graham crackers with melted butter and a bit of sugar until the mixture holds together.
- Press the crust mixture evenly into the bottom of a springform pan to create a firm base.
- Bake for 10 minutes, then let it cool while you prepare the filling.
2. Making the Cheesecake Filling
The cheesecake filling is the heart of this dessert. For a smooth texture, ensure your cream cheese is softened. This will prevent lumps and make it easier to mix.
- Beat the cream cheese with sugar and vanilla extract until smooth and creamy.
- Add the eggs, one at a time, mixing well after each addition.
- Stir in sour cream to add richness and tang.
3. Creating the Peach Cobbler Topping
The peach cobbler topping is what gives this cheesecake its unique twist. You want a soft, cinnamon-sugar-spiced peach topping that contrasts with the smooth filling.
- If using fresh peaches, peel, slice, and sauté them in butter, sugar, and cinnamon for about 5-7 minutes until soft.
- If you’re using canned peaches, drain them thoroughly and sauté them as well to remove excess liquid.
4. Assembling the Layers
Layering is the key to achieving the perfect cheesecake structure.
- Pour the cheesecake filling over the cooled graham cracker crust.
- Spoon the peach cobbler topping over the cheesecake filling, ensuring it covers the surface evenly.
- For extra texture, you can sprinkle a little extra cinnamon-sugar on top of the peaches.
5. Baking Instructions and Tips
Baking your Peach Cobbler Cheesecake requires patience and the right techniques to avoid cracks and ensure an even bake.
- Bake the cheesecake at 325°F (163°C) for about 45-50 minutes.
- To prevent cracks, consider using a water bath. This ensures even heat distribution and helps the cheesecake bake slowly without drying out.
- After baking, let it cool at room temperature before transferring it to the refrigerator. Chill for at least 4 hours or overnight to achieve the perfect creamy texture.
Cooling and Serving Suggestions
Proper cooling and serving are crucial to enjoying your Peach Cobbler Cheesecake at its best. To ensure the perfect texture and flavor, follow these tips:
Proper Cooling Techniques
- After baking, let the cheesecake cool at room temperature for at least an hour.
- Transfer to the fridge and chill for at least 4 hours, or overnight, for a smooth, creamy texture.
- For even cooling, consider placing the cheesecake on a wire rack.
Serving Temperature Recommendations
- Serve the cheesecake chilled, but not too cold. Let it sit at room temperature for 15 minutes before serving for the best flavor and texture.
- This Peach Cobbler Cheesecake can also be served with a dollop of whipped cream or vanilla ice cream for extra richness.
Garnishing Ideas
- Sprinkle with extra cinnamon sugar or top with fresh peach slices for a vibrant, decorative touch.
- Add a drizzle of caramel sauce for added sweetness.
Storage and Make-Ahead Tips
For those who want to enjoy the Peach Cobbler Cheesecake later or plan ahead for an event, these storage and make-ahead tips will ensure your dessert stays fresh and delicious.

Refrigeration Guidelines
- Always store the Peach Cobbler Cheesecake in an airtight container in the refrigerator.
- It can stay fresh for up to 5 days when properly stored.
- Before serving, let it sit at room temperature for about 15 minutes for the best texture.
Freezing Options
- Freezing is a great option for long-term storage. Wrap the cheesecake tightly in plastic wrap, then foil, and freeze for up to 2 months.
- To thaw, place it in the fridge overnight and let it come to room temperature before serving.
Best Practices for Making Ahead of Time
- You can make the cheesecake up to 2 days ahead. Simply store it in the fridge to allow the flavors to set and the texture to improve.
- If you’re short on time, the crust and topping can be made ahead and refrigerated until you’re ready to assemble.
Recipe Variations
If you want to mix things up and try different variations of the Peach Cobbler Cheesecake, here are some exciting ideas. Each version brings its own unique twist, while still maintaining the delicious creamy texture and fruity flavors.
No-Bake Version
- A no-bake version of the Peach Cobbler Cheesecake is a perfect option for hot days or when you’re short on time.
- Use a no-bake cheesecake filling, often made with cream cheese, whipped cream, and sugar, and skip the baking steps.
- For the crust, you can simply combine crushed graham crackers with butter and refrigerate to set.
Mini Cheesecakes
- For a fun twist, make mini peach cobbler cheesecakes by using a muffin tin or individual ramekins.
- Layer the crust, cheesecake filling, and peach topping as usual. These mini versions bake in a fraction of the time (about 20-25 minutes).
- For extra convenience, these can be made ahead and are perfect for serving at parties or events.
Using Different Fruits (e.g., Berries, Apples)
- Swap out the peaches for other fruits like berries, apples, or even mangoes.
- For a berry version, follow the same steps for the peach cobbler topping, but use blueberries, strawberries, or a mixed berry blend instead.
- You can also create an apple cinnamon cobbler cheesecake by sautéing apples in butter and cinnamon before topping the cheesecake.
Gluten-Free and Vegan Adaptations
- To make this dessert gluten-free, substitute the graham crackers with gluten-free graham cracker crumbs or a blend of almond flour and coconut flour for the crust.
- For a vegan version, use vegan cream cheese and coconut cream instead of dairy-based cream cheese and sour cream. You can also replace the eggs with a flax egg or chia egg.
Expert Tips for Perfect Cheesecake
To achieve the perfect Peach Cobbler Cheesecake, it’s important to master a few key techniques. With these expert tips, you’ll avoid common pitfalls and enhance the flavor for an unforgettable dessert.
Avoiding Cracks
- Cracks in your cheesecake can be caused by rapid temperature changes. To prevent this, bake your cheesecake at a low temperature (around 325°F or 163°C) and use a water bath to provide even heat distribution.
- After baking, let your cheesecake cool slowly at room temperature before transferring it to the fridge. Avoid opening the oven door during baking to maintain a consistent temperature.
Achieving a Smooth Texture
- Use room temperature ingredients, especially cream cheese and eggs, to achieve a smoother batter. Cold ingredients can cause lumps in the filling.
- Mix gently to avoid incorporating too much air into the batter, which can lead to cracks.
- For an extra-smooth texture, you can strain the batter through a fine sieve before baking.
Flavor Enhancement Techniques
- Enhance the flavor by adding a touch of vanilla extract or a hint of lemon juice to the cheesecake filling.
- To complement the peach cobbler topping, consider adding a pinch of cinnamon or nutmeg for a warm, aromatic touch.
Frequently Asked Questions (FAQs)
Can I Use Canned Peaches Instead of Fresh?
- Yes, canned peaches can be used in place of fresh peaches. However, make sure to drain them thoroughly to avoid excess moisture in the cheesecake filling.
- If you’re looking for a more natural option, you can try using peaches in light syrup or in their own juice.
Do I Need a Water Bath for Baking?
- While not absolutely necessary, using a water bath helps to create a consistent, moist baking environment. This reduces the likelihood of your cheesecake cracking during baking.
- The water bath ensures that the cheesecake bakes evenly by preventing the outer edges from cooking faster than the center.
How Long Should I Chill the Cheesecake Before Serving?
- Chill the Peach Cobbler Cheesecake for at least 4 hours in the refrigerator before serving. However, for the best results, chilling it overnight will allow the flavors to set and enhance the texture.
- Make sure to cover the cheesecake tightly to avoid any odors from the refrigerator.
Can I Make This Cheesecake Ahead of Time?
- Yes, you can prepare the cheesecake 1-2 days ahead of time. It stores well in the fridge and actually improves in flavor as it sits.
- Just make sure to cover it properly to keep it fresh.
How Do I Store Leftovers?
- Store any leftover cheesecake in an airtight container in the refrigerator for up to 5 days.
- If you’d like to store it for longer, freezing is an option (see the Storage and Make-Ahead Tips section for details).
Pairing Suggestions
When enjoying your Peach Cobbler Cheesecake, consider these beverage pairings and side dish options for a delightful experience.
Beverage Pairings
- Dessert Wines: A sweet dessert wine, such as Moscato or Late Harvest Riesling, perfectly complements the peach cobbler cheesecake, enhancing its fruity flavors.
- Coffee: A dark roast coffee or espresso pairs wonderfully with the richness of the cheesecake, offering a balance of bitterness to contrast the sweetness.
Complementary Side Dishes or Accompaniments
- Fresh berries like raspberries or blueberries add a refreshing burst of flavor.
- Consider serving with a small side of whipped cream or a drizzle of caramel sauce for extra indulgence.
Conclusion and Final Thoughts
In summary, the Peach Cobbler Cheesecake is a decadent and flavorful dessert that combines the richness of cheesecake with the sweetness of peach cobbler. Whether for a special occasion or a casual gathering, this dessert is sure to impress.
- Try the recipe today and enjoy the harmonious blend of textures and flavors.
- We invite you to share your Peach Cobbler Cheesecake creations with us. Feel free to tag us on social media or leave a comment with your version of the recipe.
super delicious fudge
- Total Time: 5 hours (including chilling)
Description
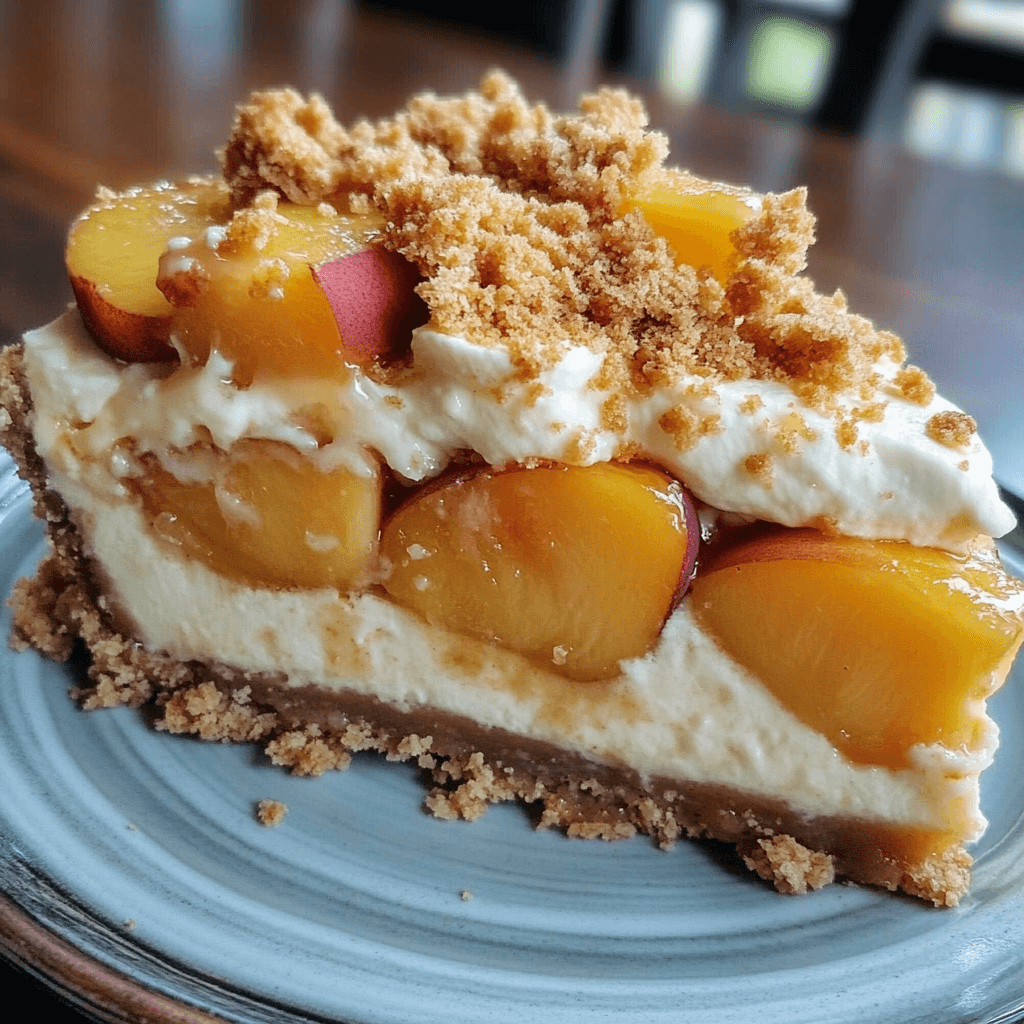
Indulge in the perfect fusion of Southern comfort and gourmet elegance with this Peach Cobbler Cheesecake. This decadent dessert features a buttery graham cracker crust, a rich and velvety New York-style cheesecake base, and a luscious topping of cinnamon-spiced peaches. It’s a show-stopping treat that perfectly balances tangy creaminess with fruity warmth—ideal for summer gatherings or any time you crave a truly special dessert.
Ingredients
- Crust: 1 ½ cups graham cracker crumbs, 1/3 cup melted butter, 2 tbsp sugar.
- Filling: 24 oz (680g) cream cheese (softened), 1 cup sugar, 1 tsp vanilla, 3 large eggs, 1/2 cup sour cream.
- Peach Topping: 3 fresh peaches (peeled/sliced), 2 tbsp butter, 1/4 cup brown sugar, 1/2 tsp cinnamon.
Instructions
- Prepare Crust: Mix crumbs, butter, and sugar. Press into a 9-inch springform pan and bake at 325°F (163°C) for 10 minutes. Cool.
- Make Filling: Beat cream cheese and sugar until smooth. Add vanilla and sour cream. Mix in eggs one at a time until combined. Pour over crust.
- Prepare Peaches: Sauté sliced peaches with butter, brown sugar, and cinnamon until tender. Spoon evenly over the cheesecake batter.
- Bake: Bake at 325°F (163°C) for 45–50 minutes. (A water bath is recommended for best results).
- Cool: Cool at room temperature, then refrigerate for at least 4 hours (ideally overnight) before serving.
- Prep Time: 20 minutes
- Cook Time: 50 minutes
- Category: Dessert / Cheesecake
Nutrition
- Serving Size: 12 servings