
Introduction to Cotton Candy Swirl Glow in the Dark Candy Apples
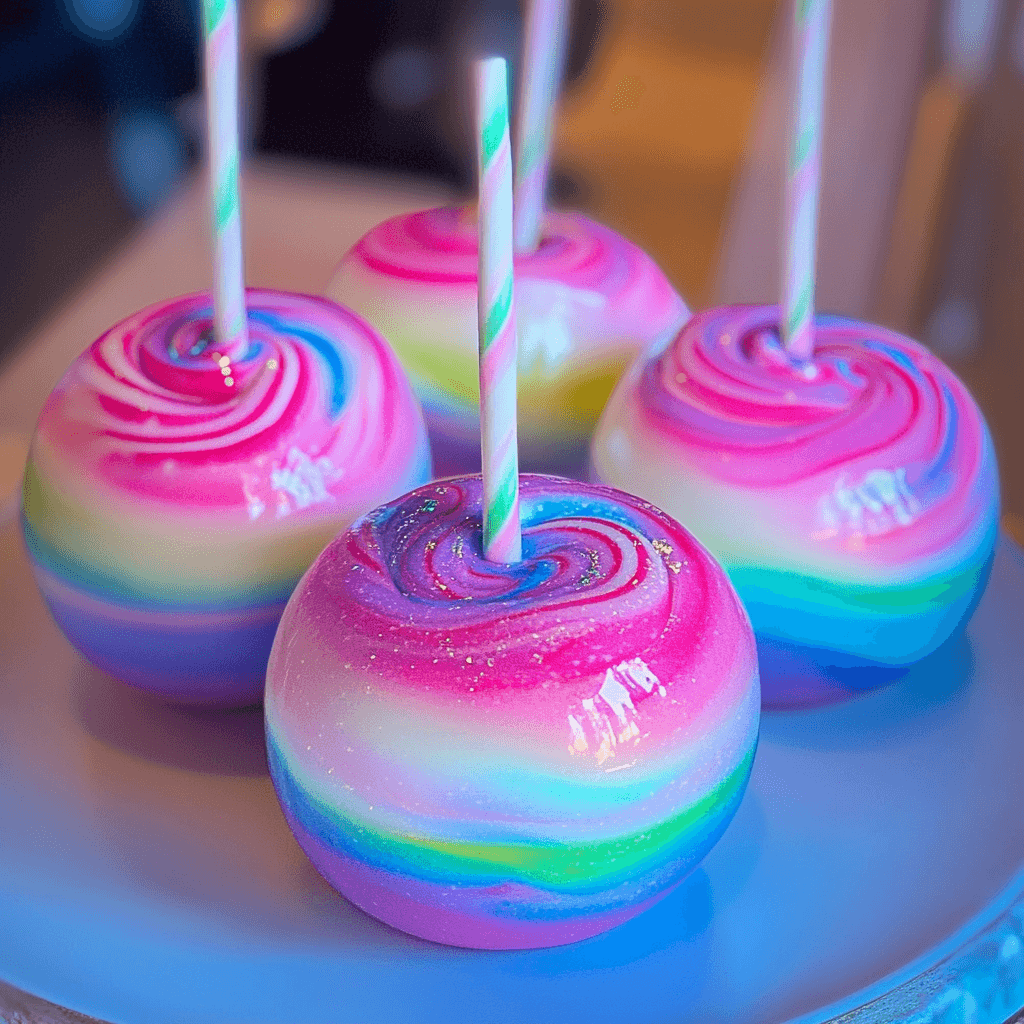
If you’re looking for a show-stopping treat that dazzles under black lights and brings a fun twist to traditional confections, Cotton Candy Swirl Glow in the Dark Candy Apples are your answer. These colorful, luminous apples are coated in a glossy, candy shell with vibrant swirl designs, creating a magical glow that makes them perfect for parties and themed events.
This glowing effect isn’t just for show — it’s achieved using food-safe techniques. For instance, edible glow powders or tonic water with quinine can be used to create the effect when placed under black light.
These treats are gaining traction at:
- Halloween parties and haunted houses
- Glow-themed birthday events
- School carnivals and fall festivals
Incorporating cotton candy flavoring and vibrant color swirls enhances both the look and taste. Using gel-based colors helps create bold, defined swirls that stand out under UV lighting. The final result? A sweet and tart explosion of color and flavor that captivates both kids and adults alike.
What Makes Glow in the Dark Candy Apples Unique
Glow in the dark candy apples are a mesmerizing twist on the traditional treat, combining the classic appeal of candied fruit with a stunning glowing effect. The glow is achieved through the use of tonic water (which contains quinine) or food-safe glow powders that react to UV light, making them shine under black light. This fun glowing effect is not only visually striking but also creates an exciting experience for anyone enjoying the treat.
One of the most captivating features of these apples is the cotton candy colors and swirls of candy coating. By using vibrant food coloring gels, you can create beautiful combinations, from pastel pinks and blues to bold neon shades, which add to their aesthetic appeal. The swirling effect brings a playful, artistic touch to the candy apples, making them stand out at parties or events.
These glowing treats have gained popularity, particularly among kids and on social media platforms. The stunning visual impact and unique presentation make them perfect for Instagram-worthy moments, contributing to their growing trend in food culture.
Ingredients and Tools Required
Creating the perfect Cotton Candy Swirl Glow in the Dark Candy Apples starts with gathering the right ingredients and tools. These elements ensure both the taste and visual effects meet the high standards that make this treat unforgettable.

Core Ingredients
Use fresh and crisp apples as your base—Granny Smith and Fuji are great options thanks to their firm texture and tart flavor. You’ll also need a few staple candy-making ingredients:
- 6–8 medium apples (Granny Smith, Fuji, or Honeycrisp)
- 2 cups granulated sugar
- 1/2 cup light corn syrup
- 1/2 cup water
- 1/4 tsp cream of tartar (helps prevent crystallization)
- 1 tsp vanilla extract
- Food coloring gel (preferably blue and pink for cotton candy effect)
- 1/4 tsp cotton candy flavor extract (optional but enhances authenticity)
- Glow effect additive such as edible glow powder or tonic water with quinine
Essential Tools
Equipping your kitchen with the right tools will make the candying process smoother and safer:
- Candy thermometer (essential for temperature accuracy)
- Medium or large saucepan (preferably with a heavy bottom)
- Parchment paper or silicone mat (to prevent sticking)
- Wooden skewers or candy sticks for dipping and serving
Preparing the Apples
Properly preparing the apples is key to ensuring that the candy coating sticks well and creates a smooth, glossy finish. Whether you’re using Granny Smith or Fuji, start by selecting apples that are firm and free of bruises.
Step-by-Step Preparation
Before candying, it’s essential to remove the waxy coating found on most store-bought apples. This wax prevents the candy from adhering correctly. A simple method is to dip the apples in boiling water for a few seconds and then scrub them with a clean towel.
After cleaning:
- Thoroughly dry the apples to avoid splattering when dipping into hot sugar syrup.
- Insert wooden sticks or candy apple skewers into the center of each apple.
- Arrange apples on parchment paper or a silicone mat, ensuring they stand upright and are spaced apart.
This setup ensures your apples are ready for an even and safe dipping process.
Making the Candy Coating
Creating a glossy, crackly shell for your glow in the dark candy apples requires careful handling of temperature and timing. The candy coating is what gives your apples that irresistible crunch and visual appeal.
Step-by-Step Instructions
To begin, combine the following in a heavy-bottomed saucepan:
- Granulated sugar
- Corn syrup
- Water
- Cream of tartar
Heat over medium-high until the mixture reaches the hard crack stage (300°F / 150°C). Using a candy thermometer is essential.
Once it hits the right temperature, immediately remove it from the heat. Stir in:
- Vanilla extract or your desired flavoring
- Food coloring gel (like pink or blue)
- Optional: cotton candy extract for extra sweetness
- Your glow additive
Tips for a Vivid Swirl Effect
- Divide the candy mixture into separate bowls and tint each with a different gel food color.
- When dipping apples, alternate pouring each color down the sides or swirl them together lightly.
- Avoid overmixing to prevent muddy colors.
These techniques ensure your apples have a stunning swirl that grabs attention—perfect for parties and social media!
Dipping and Setting the Apples
Once your candy coating is ready, it’s time to dip the apples. The key is achieving a smooth, even coating that hardens with a glossy finish. Make sure your apples are firmly skewered and your candy mixture is hot but workable.
Best Practices for a Uniform Coating
- Hold the apple by the stick and dip it slowly into the candy.
- Gently rotate the apple to coat all sides evenly.
- Allow excess coating to drip off before placing it down.
To elevate the visual appeal, use the twisting method. After dipping, give the apple a slow spin as you lift it out of the mixture. This helps create a natural swirl pattern, especially when using multiple colors.
Place each dipped apple on parchment paper to cool and harden. Avoid wax paper as the candy may stick . Let the apples set completely at room temperature for a crisp, professional finish.
Tips for Best Results
Creating the perfect candy-coated apple requires precision, timing, and a clean workspace. To ensure your candy turns out beautifully glossy and hard, it’s crucial to control the temperature and work efficiently.
Always monitor the candy mixture with a candy thermometer. Reaching the hard crack stage—around 300°F (150°C)—is essential. Any lower, and the coating may turn tacky or soft.
Because the mixture cools and hardens rapidly, you must work quickly during the dipping process. Avoid delays between coloring, flavoring, and coating. Using dry utensils and pans is also vital, as even a drop of water can trigger sugar crystallization .
Here are a few more tips to maximize success:
- Wear food-safe gloves to prevent sticky fingers and maintain grip.
- Keep apples close and ready before you begin dipping.
- Use parchment-lined trays to prevent sticking during the setting process.
Following these expert techniques will give your candy apples a flawless finish every time.
Variations and Customization Ideas
One of the most exciting parts of making candy apples is the ability to get creative with color and flavor. With a few tweaks, you can transform the classic recipe into a festive showstopper.
Experiment with different food coloring combinations like purple and green for Halloween or red and gold for a glamorous party theme.
For added sparkle, try edible glitter or confetti sprinkles. These elements create a dazzling finish and are perfect for birthdays or special events.
Customize the flavor by adding extracts such as bubble gum, raspberry, or cherry—these bring a fun twist that complements the bright colors. You can even create themed apples for holidays like Valentine’s Day, Christmas, or Independence Day by adjusting both flavor and visual style.
Serving Suggestions
There are plenty of creative ways to showcase Cotton Candy Swirl Glow in the Dark Candy Apples that will impress your guests.
- On dessert tables: These eye-catching treats make a colorful and unique addition to any dessert spread.
- As party favors: Wrap each candy apple in plastic wrap with a ribbon for a thoughtful and fun gift.
- Displayed under black light: Showcase the glow effect by placing them under a black light at your event for an unforgettable experience.
Storage Instructions
To keep your glow in the dark candy apples fresh and delicious, follow these simple storage tips:
- Best stored at room temperature: Place them in a dry, cool area, away from heat or sunlight.
- Avoid humidity and refrigeration: Candy coatings can become sticky or soften if exposed to moisture or cold.
- Ideal shelf life of 2-3 days: For the best taste and texture, enjoy your candy apples within a few days of making them.
Safety and Food Coloring Considerations
When preparing Cotton Candy Swirl Glow in the Dark Candy Apples, safety is a top priority. Here are some essential safety tips:
- Ensuring food-safe glow ingredients: Always use edible tonic or glow powder that is specifically labeled as food-safe. Check the manufacturer’s guidelines to ensure they are suitable for consumption.
- Checking labels for FDA approval: Verify that the food coloring and glow effect additives you are using are approved by the FDA.
- Supervising children around hot sugar mixtures: Hot sugar can burn quickly. Always keep a close watch on children when working with hot candy mixtures to avoid accidents.
- Storing away from pets and small children: To prevent accidents or ingestion of non-food items, store your candy apples in a secure, child- and pet-free area.
Frequently Asked Questions
Q1: How do I make the apples glow in the dark?
A: To make the apples glow, use tonic water (with quinine) or food-safe glow powders. These ingredients react to UV light, creating the glowing effect when placed under black light.
Q2: What kind of food coloring should I use?
A: Gel-based food coloring is the best option for vibrant results. It blends seamlessly into the candy syrup, ensuring an even and rich color. Avoid using liquid food coloring, as it can alter the candy’s consistency.
Q3: Can I make this recipe without a candy thermometer?
A: While it is possible to use the cold water test method to check the candy’s readiness, a candy thermometer is highly recommended for precision and avoiding overcooking. The thermometer ensures you reach the hard crack stage (300°F or 150°C), which is crucial for achieving the perfect candy coating.
Q4: Can I use any type of apple?
A: While you can use any apple variety, tart apples like Granny Smith provide a nice contrast to the sweet coating. Other varieties, such as Fuji or Honeycrisp, are also great choices for a sweeter, juicier apple. The key is to choose apples that are firm enough to hold the coating.
Q5: How long do they take to set?
A: The apples will typically take 10-15 minutes to set at room temperature. However, avoid placing them in a humid environment, as this can cause the coating to become sticky. For a faster set, try placing the apples in a cool, dry area.
Q6: Are these safe for kids to eat?
A: Yes, these candy apples are safe for children to eat, as long as they are made with food-safe glow products. Always check the ingredient labels to ensure the products used are edible. Additionally, supervise children during preparation, especially when working with hot sugar mixtures.
Q7: Why did my candy coating crystallize?
A: Crystallization in candy coatings can occur if you stir the mixture during boiling or if utensils have moisture on them. To avoid this, make sure all your tools are clean and dry before use. Additionally, avoid stirring the mixture once it starts boiling, as this can introduce air and cause unwanted crystallization.
Conclusion
Creating glowing candy apples is a fun and unique treat that combines the sweet flavor of candied apples with a magical glowing effect. By following the steps and tips provided, you can make these treats for parties, holidays, or any special occasion. Remember, the key to perfect glowing apples lies in the temperature accuracy, quality ingredients, and working quickly before the candy mixture hardens.
With a little creativity, you can customize the appearance and flavor to suit your event, whether by adding edible glitter, experimenting with food coloring, or using different flavored extracts. Don’t forget to pay attention to safety precautions, especially when working with hot sugar mixtures and food-safe glow ingredients.
These glowing candy apples will surely impress your guests and provide a fun, delicious, and visually striking dessert for all ages!
Print
Cotton Candy Swirl Glow in the Dark Candy Apples
- Total Time: 40 minutes
Description
Glow in the dark candy apples are a trendy and visually stunning treat, perfect for parties and social media. These vibrant apples are made using food-safe ingredients that create a glowing effect, typically achieved through tonic water or glow powders that react under black light. The candy coating is often decorated with cotton candy colors and mesmerizing swirls, making the apples both delicious and eye-catching. These treats are especially popular among kids and food enthusiasts looking to create unique and shareable experiences. With simple ingredients and easy preparation, glow in the dark candy apples are a fun and safe way to add a little magic to any occasion.
Ingredients
- Apples
- Granulated Sugar
- Corn Syrup
- Water
- Cream of Tartar
- Vanilla Extract
- Food Coloring Gel
- Cotton Candy Flavor Extract
- Glow Effect Additive
Instructions
- Clean and Dry the Apples: Thoroughly wash and dry the apples to remove any wax coating.
- Insert the Sticks: Insert wooden skewers or candy sticks into the apple stems and arrange the apples for easy dipping.
- Make the Candy Coating: Heat sugar, corn syrup, water, and cream of tartar in a saucepan. Heat until it reaches 300°F (hard crack stage).
- Add Flavors and Colors: Remove from heat and mix in vanilla extract, food coloring gel, and optional flavor extracts or glow additives.
- Dip the Apples: Dip the apples into the candy mixture, twisting gently to enhance the swirl effect.
- Set the Apples: Place apples on parchment paper and allow them to cool and harden completely.
- Prep Time: 10 minutes
- Cook Time: 15 minutes
- Cuisine: American, Global
Nutrition
- Calories: 220
Keywords: DIY Candy Apples, Glow Candy Apples, Glow in the Dark Candy Apples, Halloween Treats, Party Candy